(80x80).jpg.4d18b9ffc0b5cc76b2a475cd46560d03.jpg)
Vanishing Point
-
Posts
76 -
Joined
-
Last visited
Everything posted by Vanishing Point
-

-
Yessssssssssssssssss , The FIRST ONE in SHOWROOM UK https://www.boltonmotorcycles.co.uk/new-bikes/suzuki
-
(80x80).thumb.jpg.84a686ac508dcbab4d250152988f64e9.jpg)
Gen3 brake recall ....
Vanishing Point replied to mark3evo's topic in Gen 3 Hayabusa (2021 - onwards
23 pages MC Recall RCMN-23V088-5855.pdf -
Gen3 brake recall ....
Vanishing Point replied to mark3evo's topic in Gen 3 Hayabusa (2021 - onwards
Recall MC pdf from Suzuki RCMN-23V088-5855.pdf suzuki-recalls-hayabusa-over-brake-system-issue-22my-affected-211090.pdf RCLRPT-23V088-9311.PDF
-
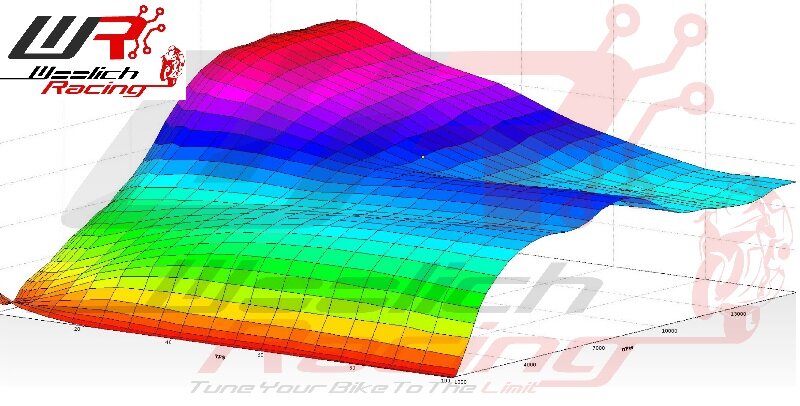
News from WoolichRacing for GEN3
Vanishing Point replied to Vanishing Point's topic in Gen 3 Hayabusa (2021 - onwards
Big KIT now 4 sale https://www.woolichracing.eu/products/suzuki/gsx1300r-hayabusa/2021/1339/2021-2023-suzuki-gsx1300r-hayabusa-log-box-d-can-zeitronix-zt-3-wideband-package.aspx -
News from WoolichRacing for GEN3
Vanishing Point replied to Vanishing Point's topic in Gen 3 Hayabusa (2021 - onwards
@JOHN-DYNOSTAR Do you have NEWS -
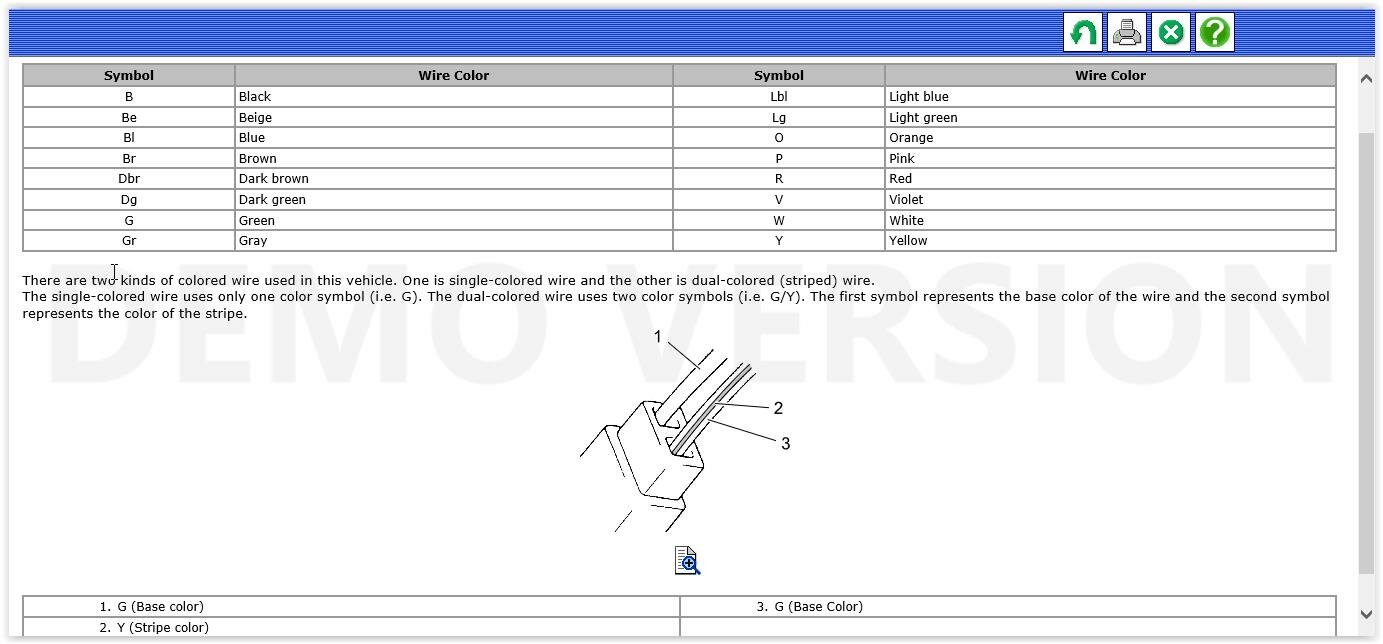
Gen3 colour wiring diagram
Vanishing Point replied to Vanishing Point's topic in Gen 3 Hayabusa (2021 - onwards
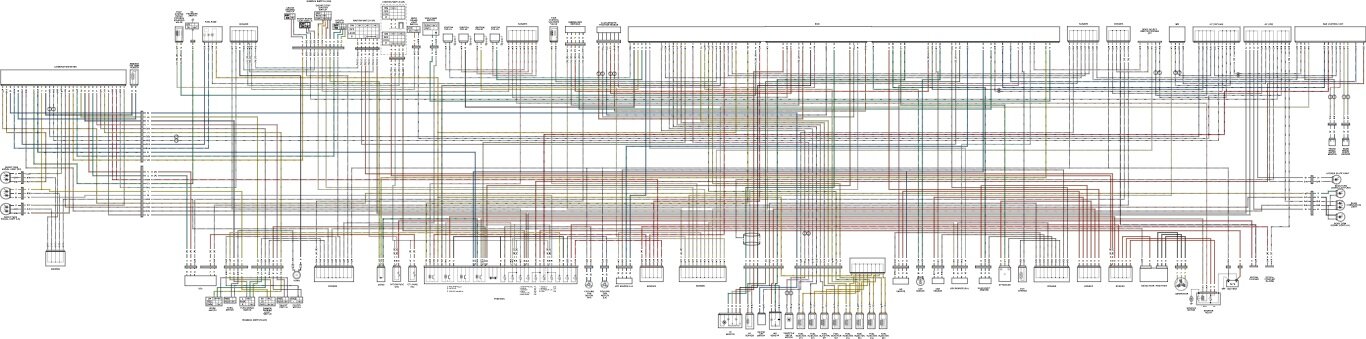
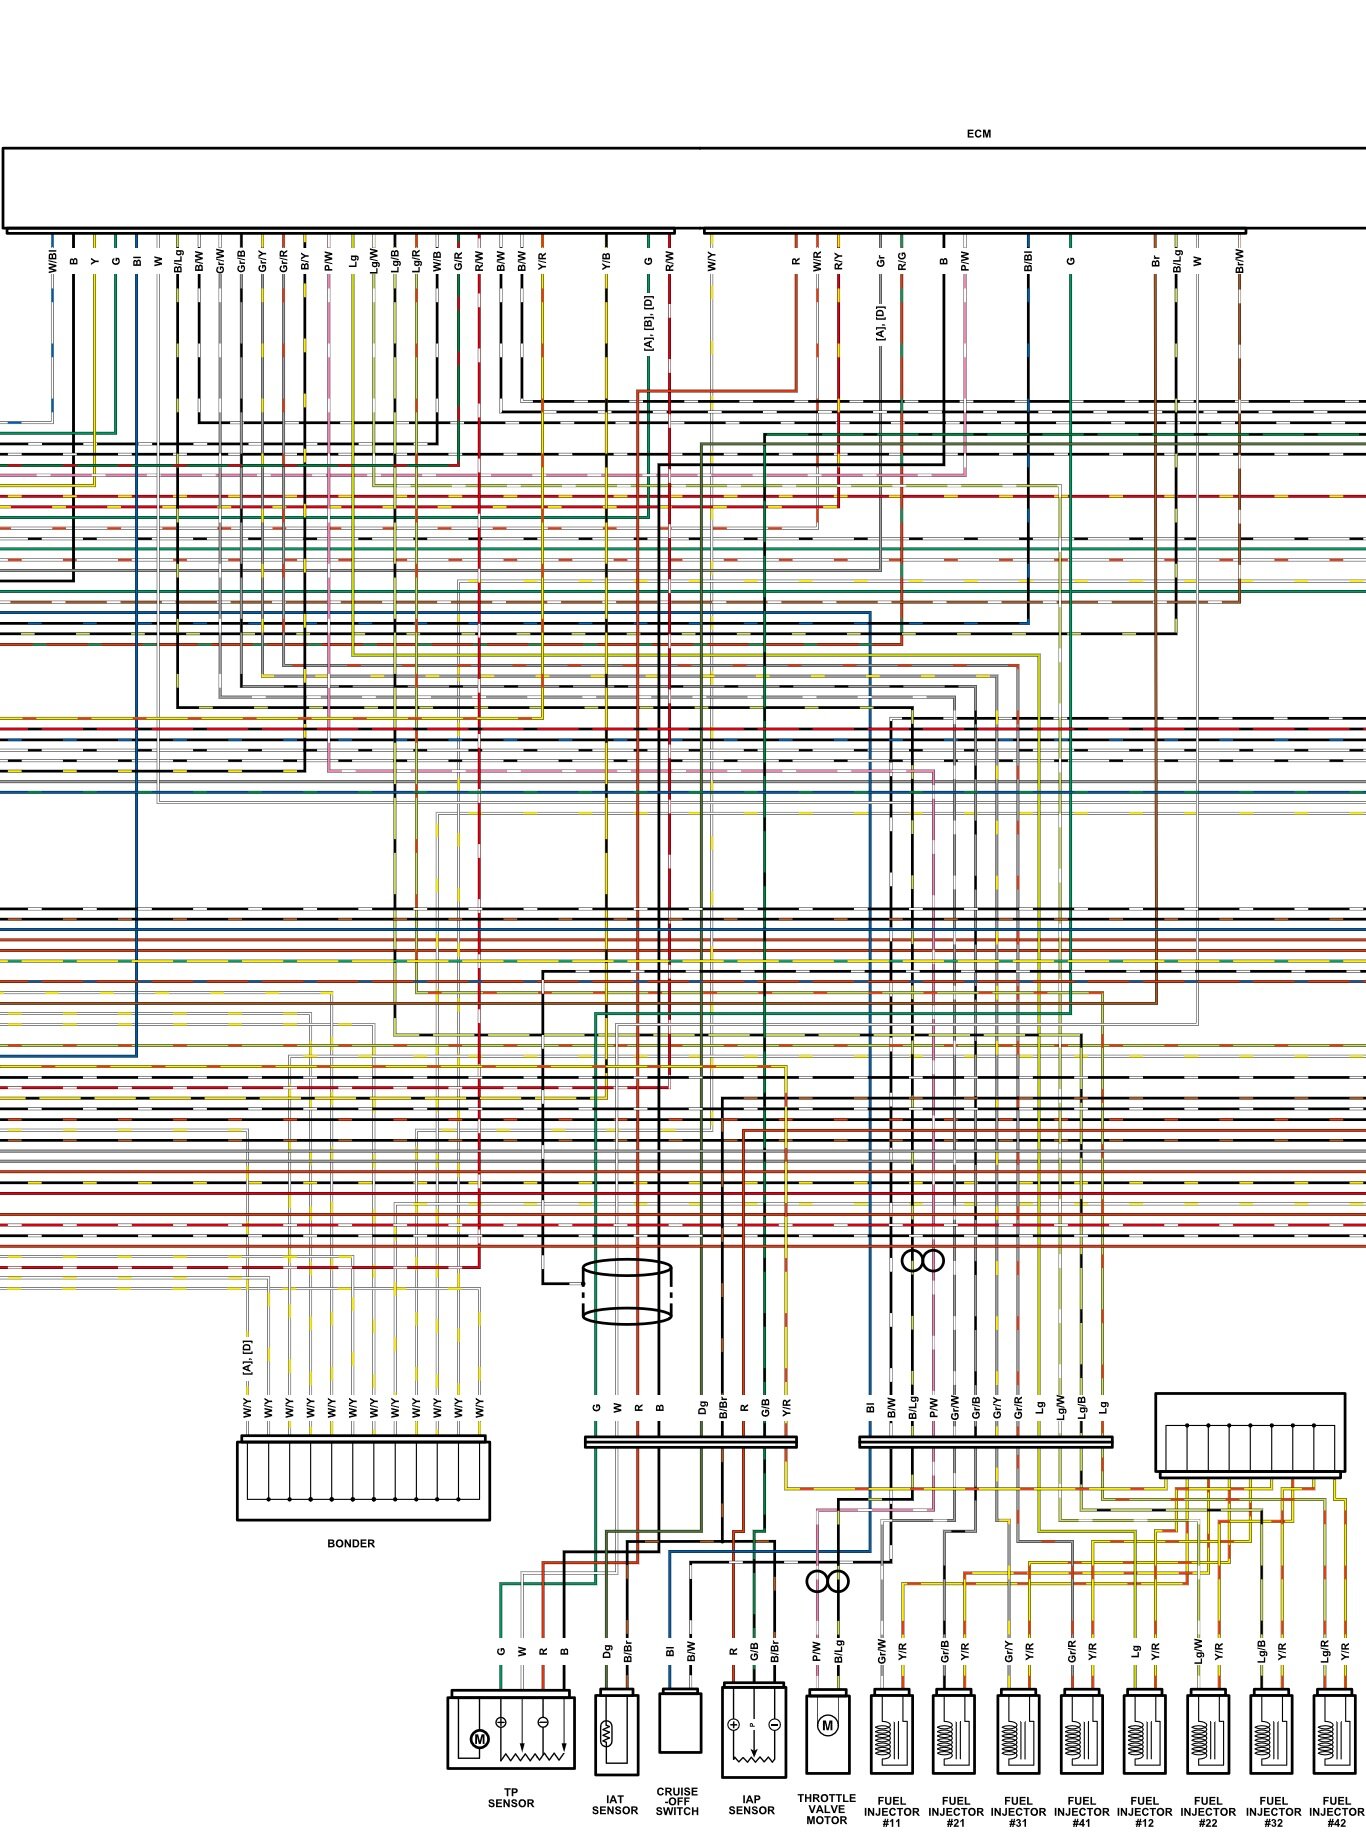
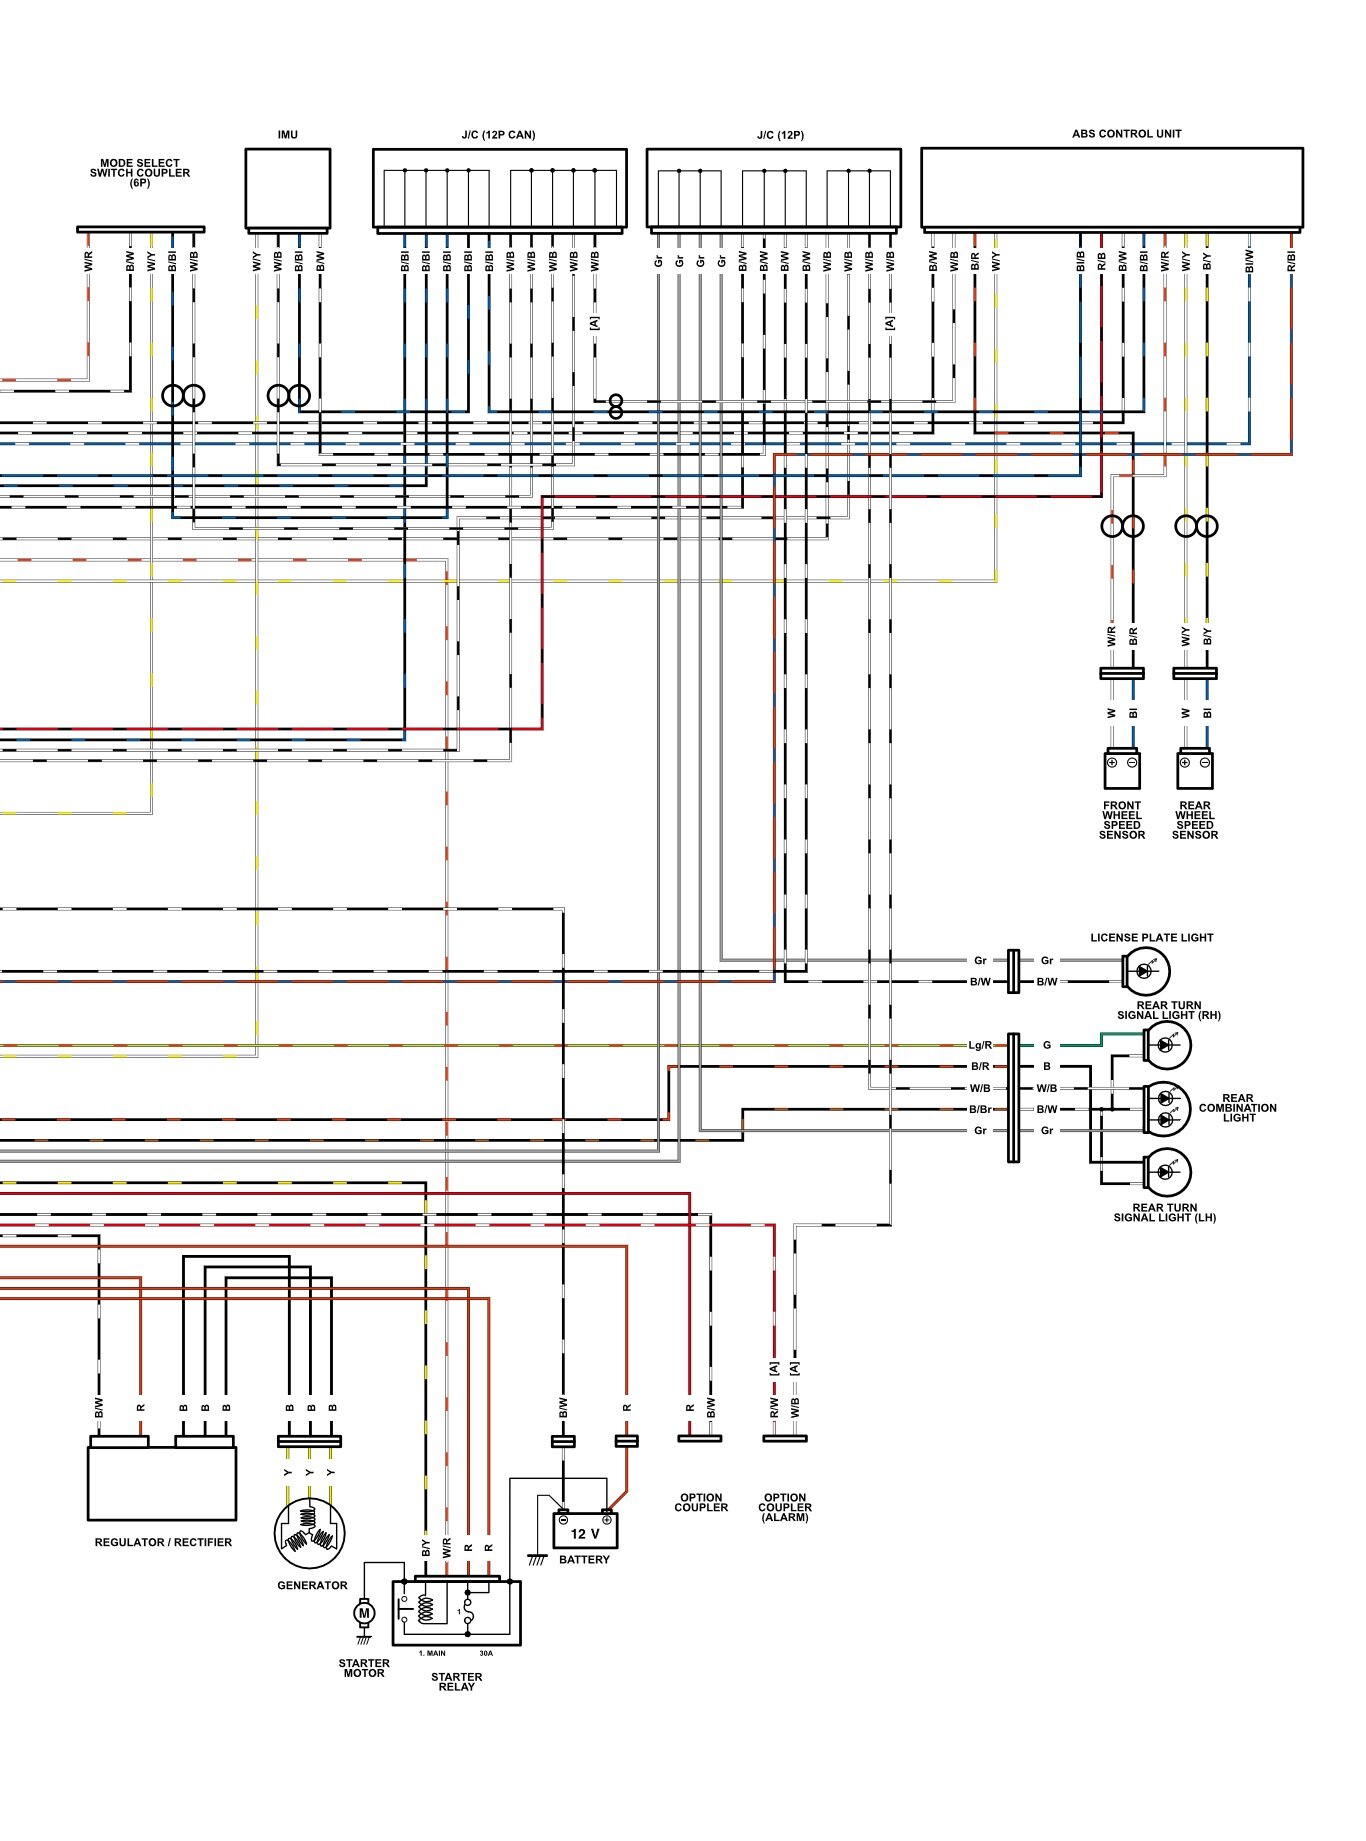
New big one .png 25000x6211 pixel color wiring scheme Link from H.o R g https://www.dropbox.com/s/bvl62g11wbvy1b1/IM10L1910920 (2).png?dl=0 -
-
-
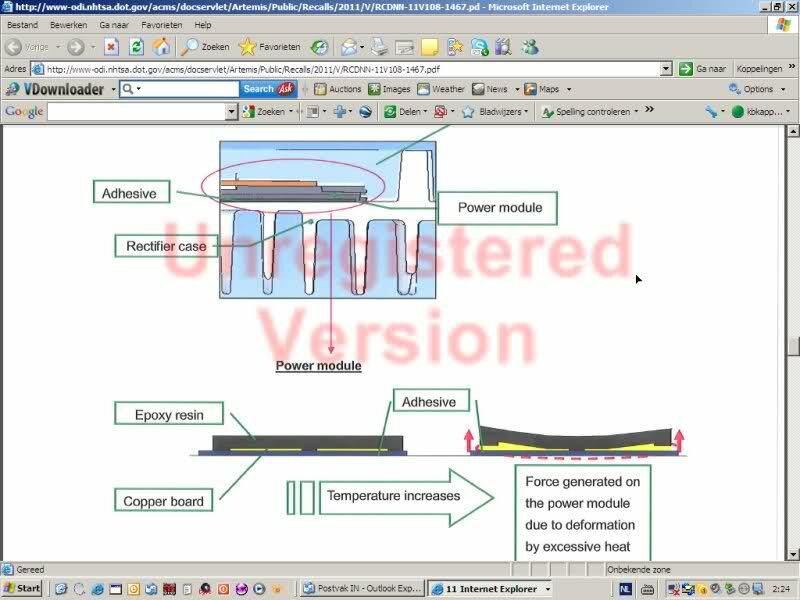
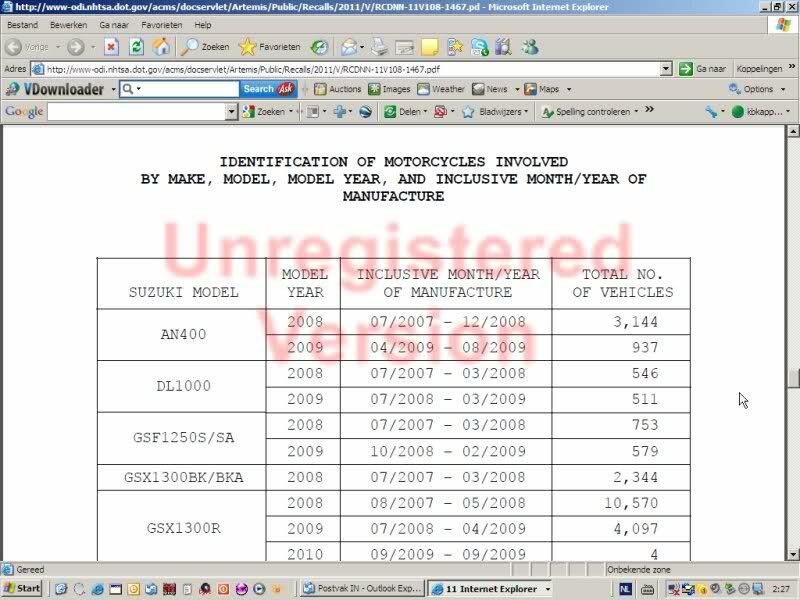
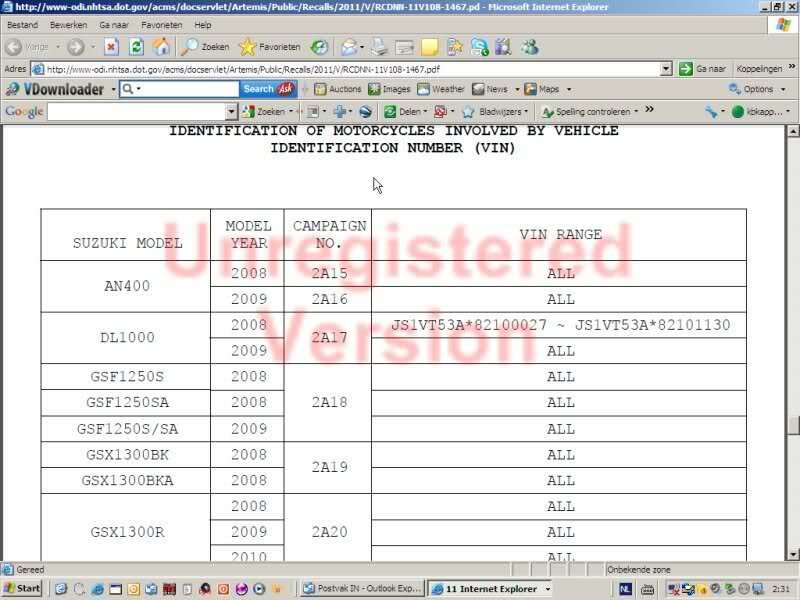
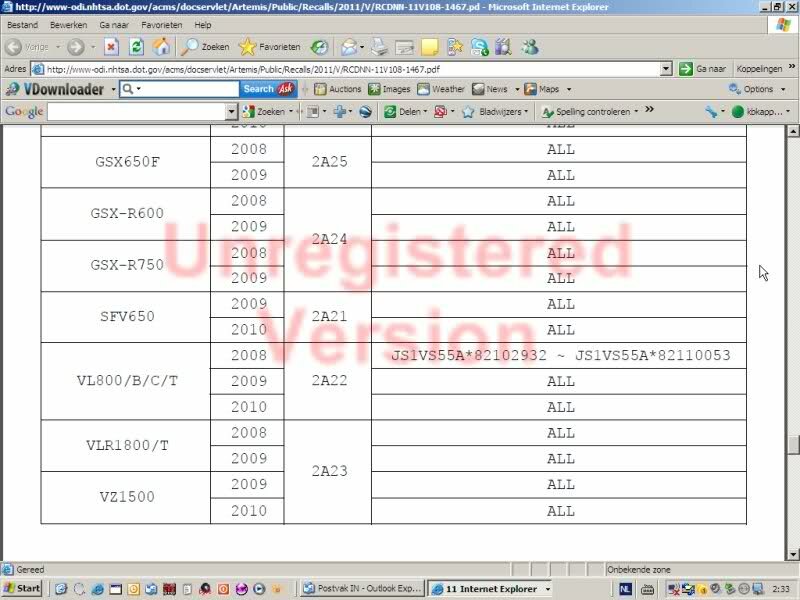
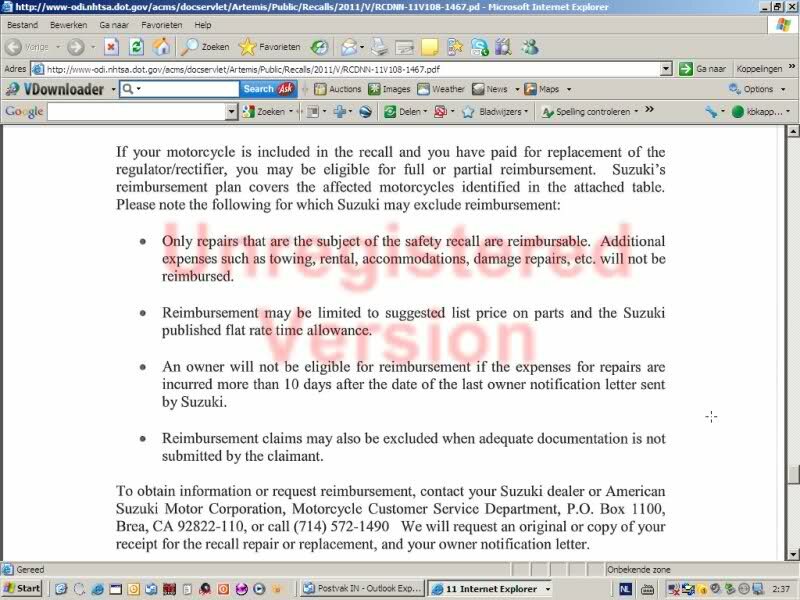
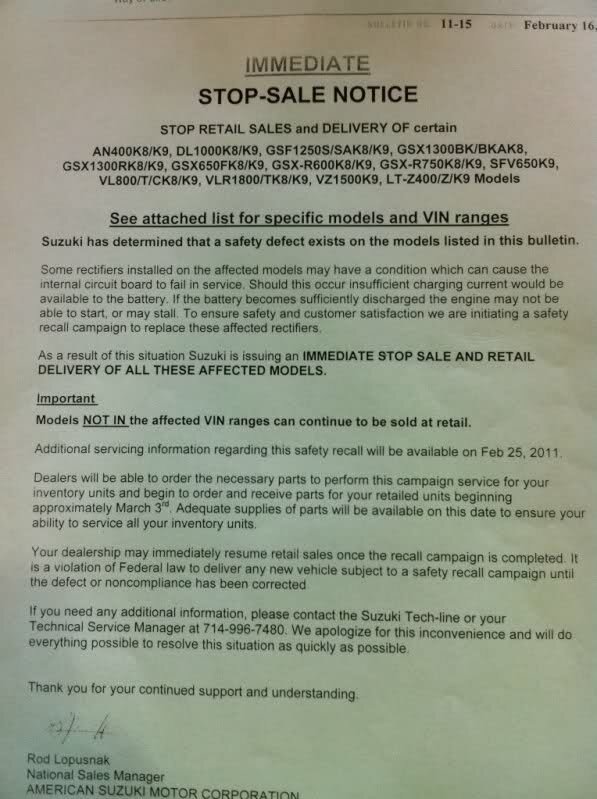
JOHN , you know it's he Re - Recall The First reg.rec recall 25-2-2011 PAPER
-
News from WoolichRacing for GEN3
Vanishing Point replied to Vanishing Point's topic in Gen 3 Hayabusa (2021 - onwards
-
News from WoolichRacing for GEN3
Vanishing Point replied to Vanishing Point's topic in Gen 3 Hayabusa (2021 - onwards
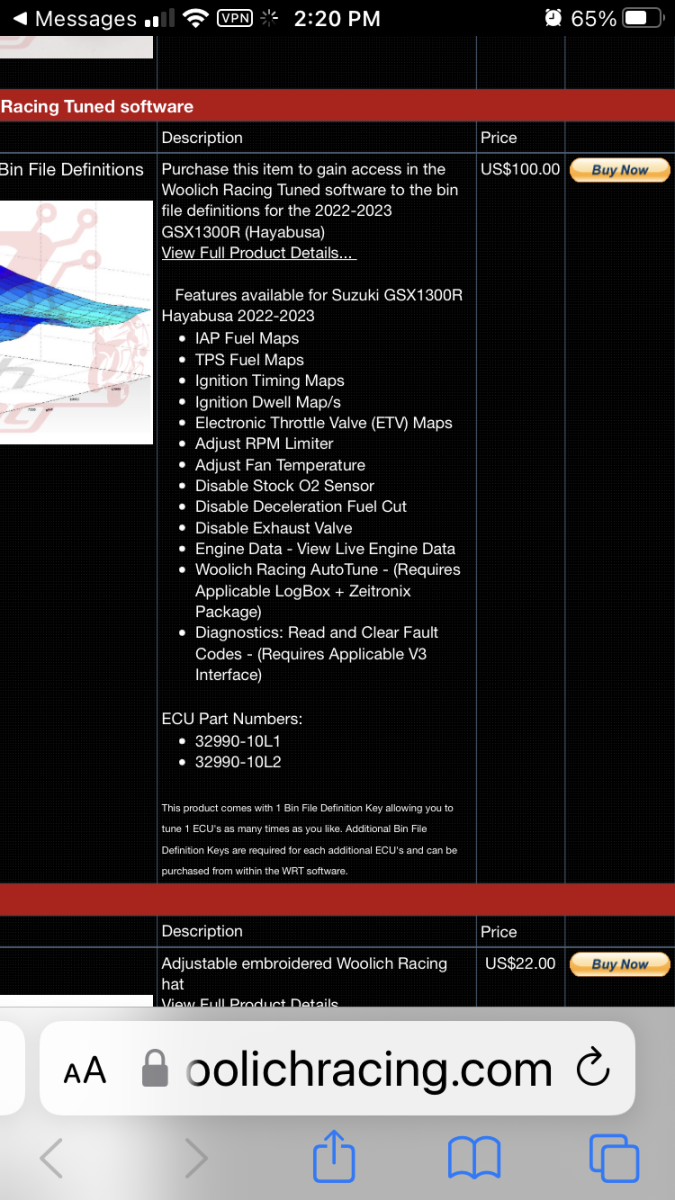
Any Members here with a WR Account ? -
I hope it works https://www.woolichracing.eu/products/suzuki/gsx1300r-hayabusa/2022/1335/2022-2023-gsx1300r-hayabusa-stock-bin-file-definitions.aspx
-
Gen3 colour wiring diagram
Vanishing Point replied to Vanishing Point's topic in Gen 3 Hayabusa (2021 - onwards
B I G Thanxs4Stitched the six pics -
Gen3 colour wiring diagram
Vanishing Point replied to Vanishing Point's topic in Gen 3 Hayabusa (2021 - onwards
I got this Schemes in JPEG ------- BMP-------PNG---------SVG Hope there is a member here , that MADE from the SIX Files , A BIG FILE for Print in A1 format ? ? -
-
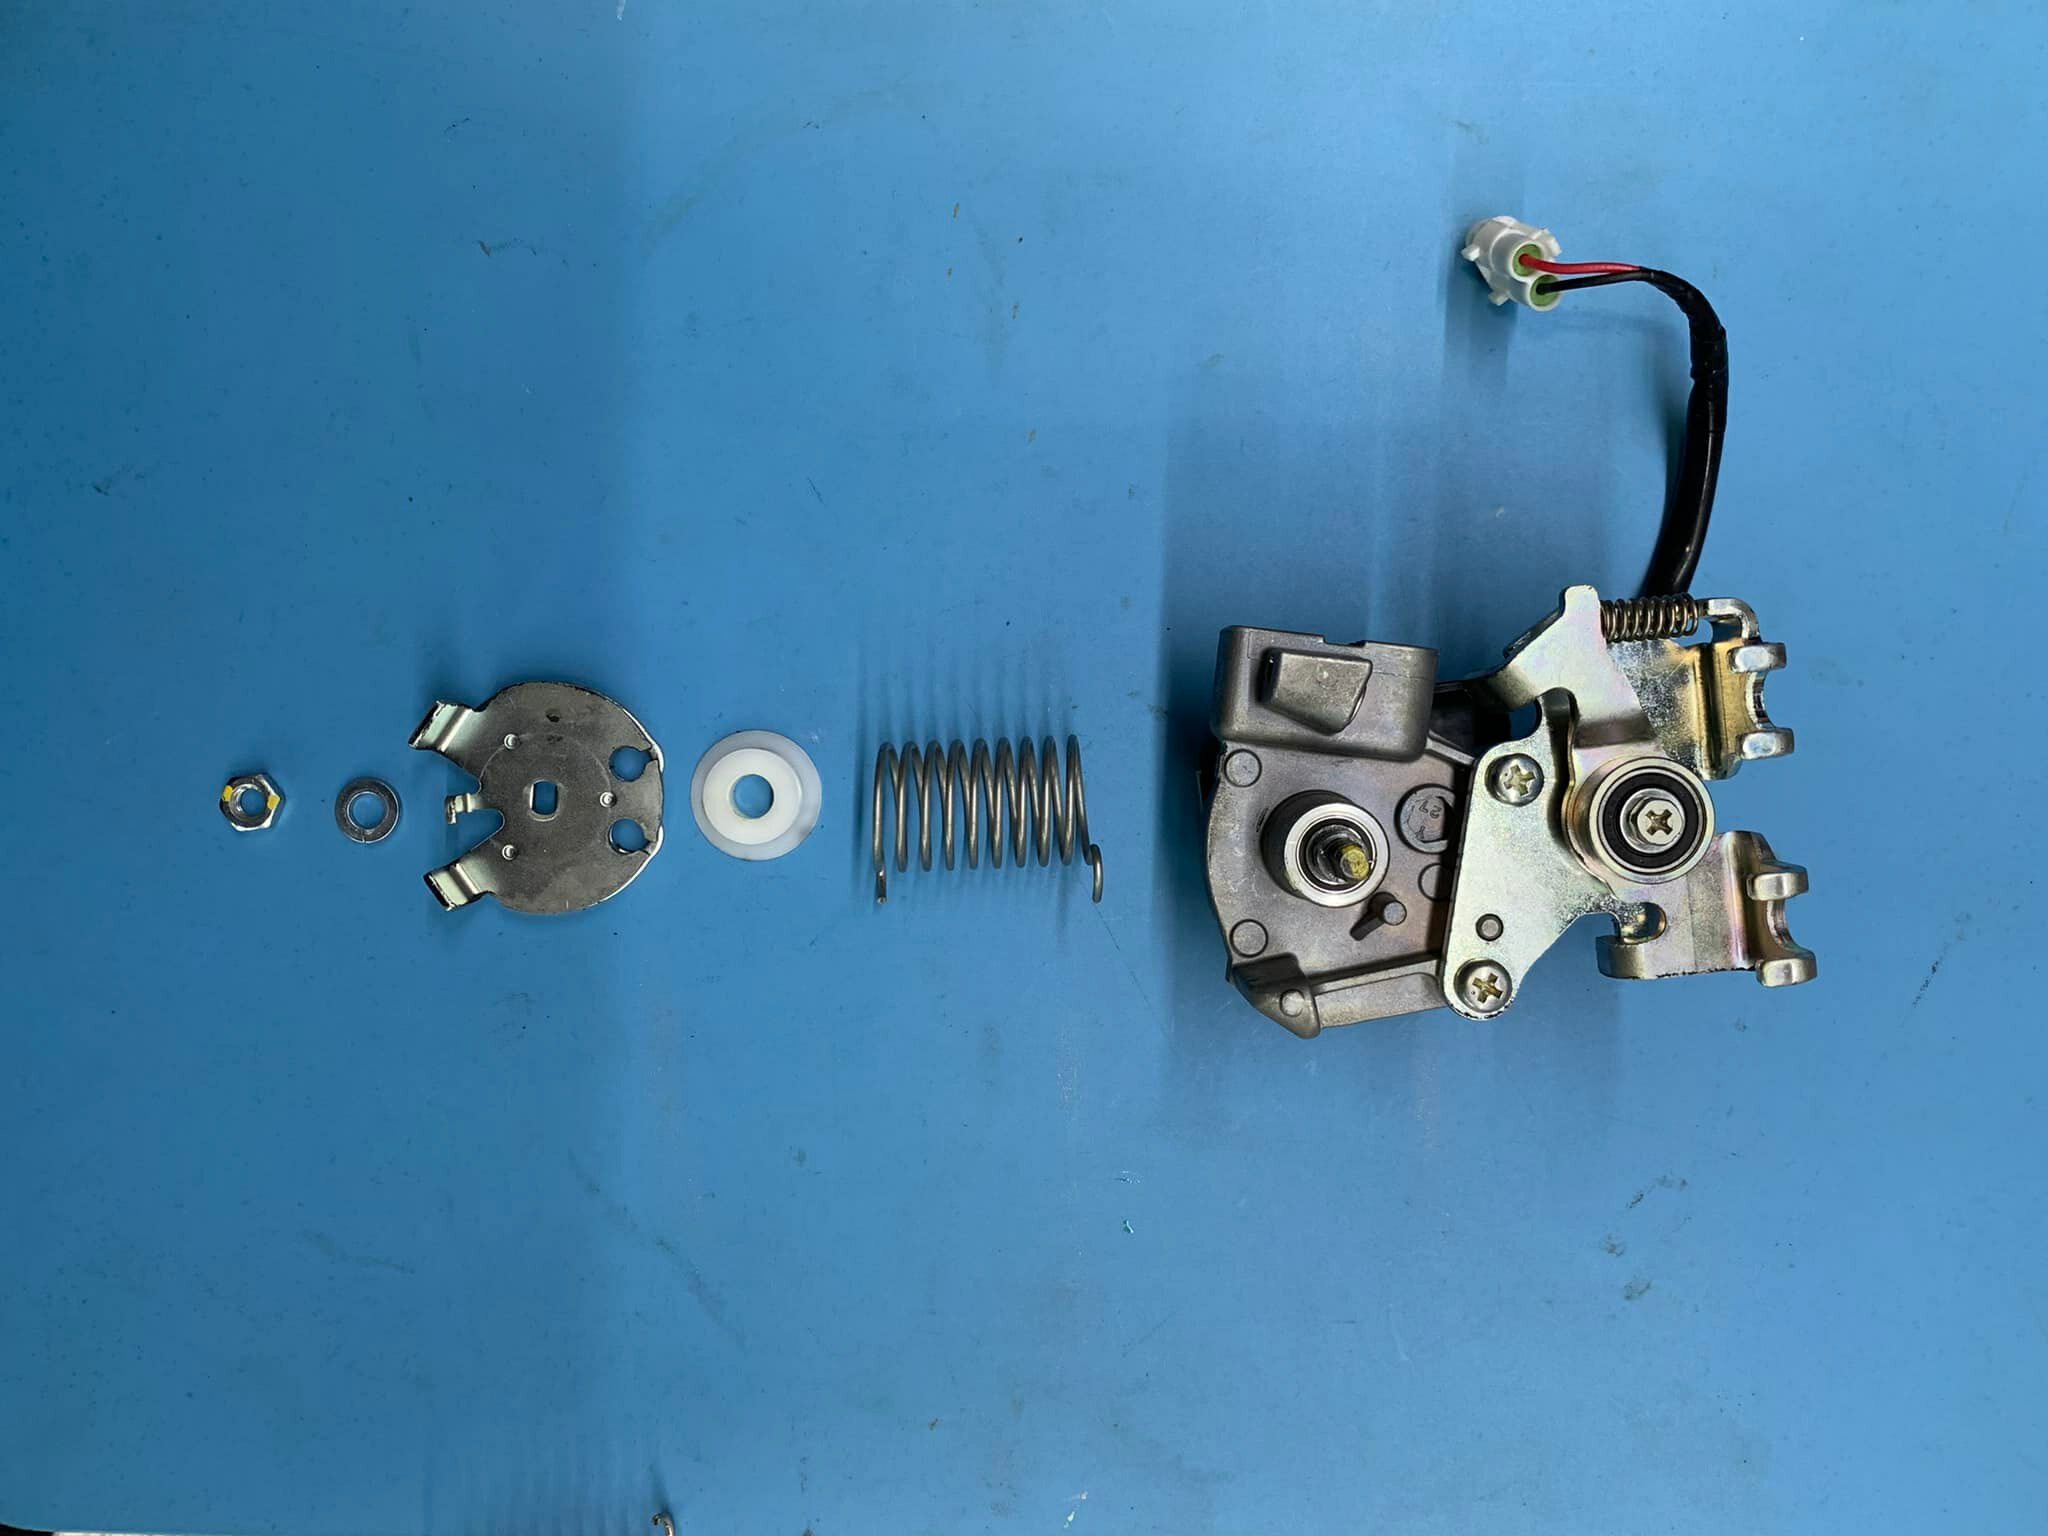
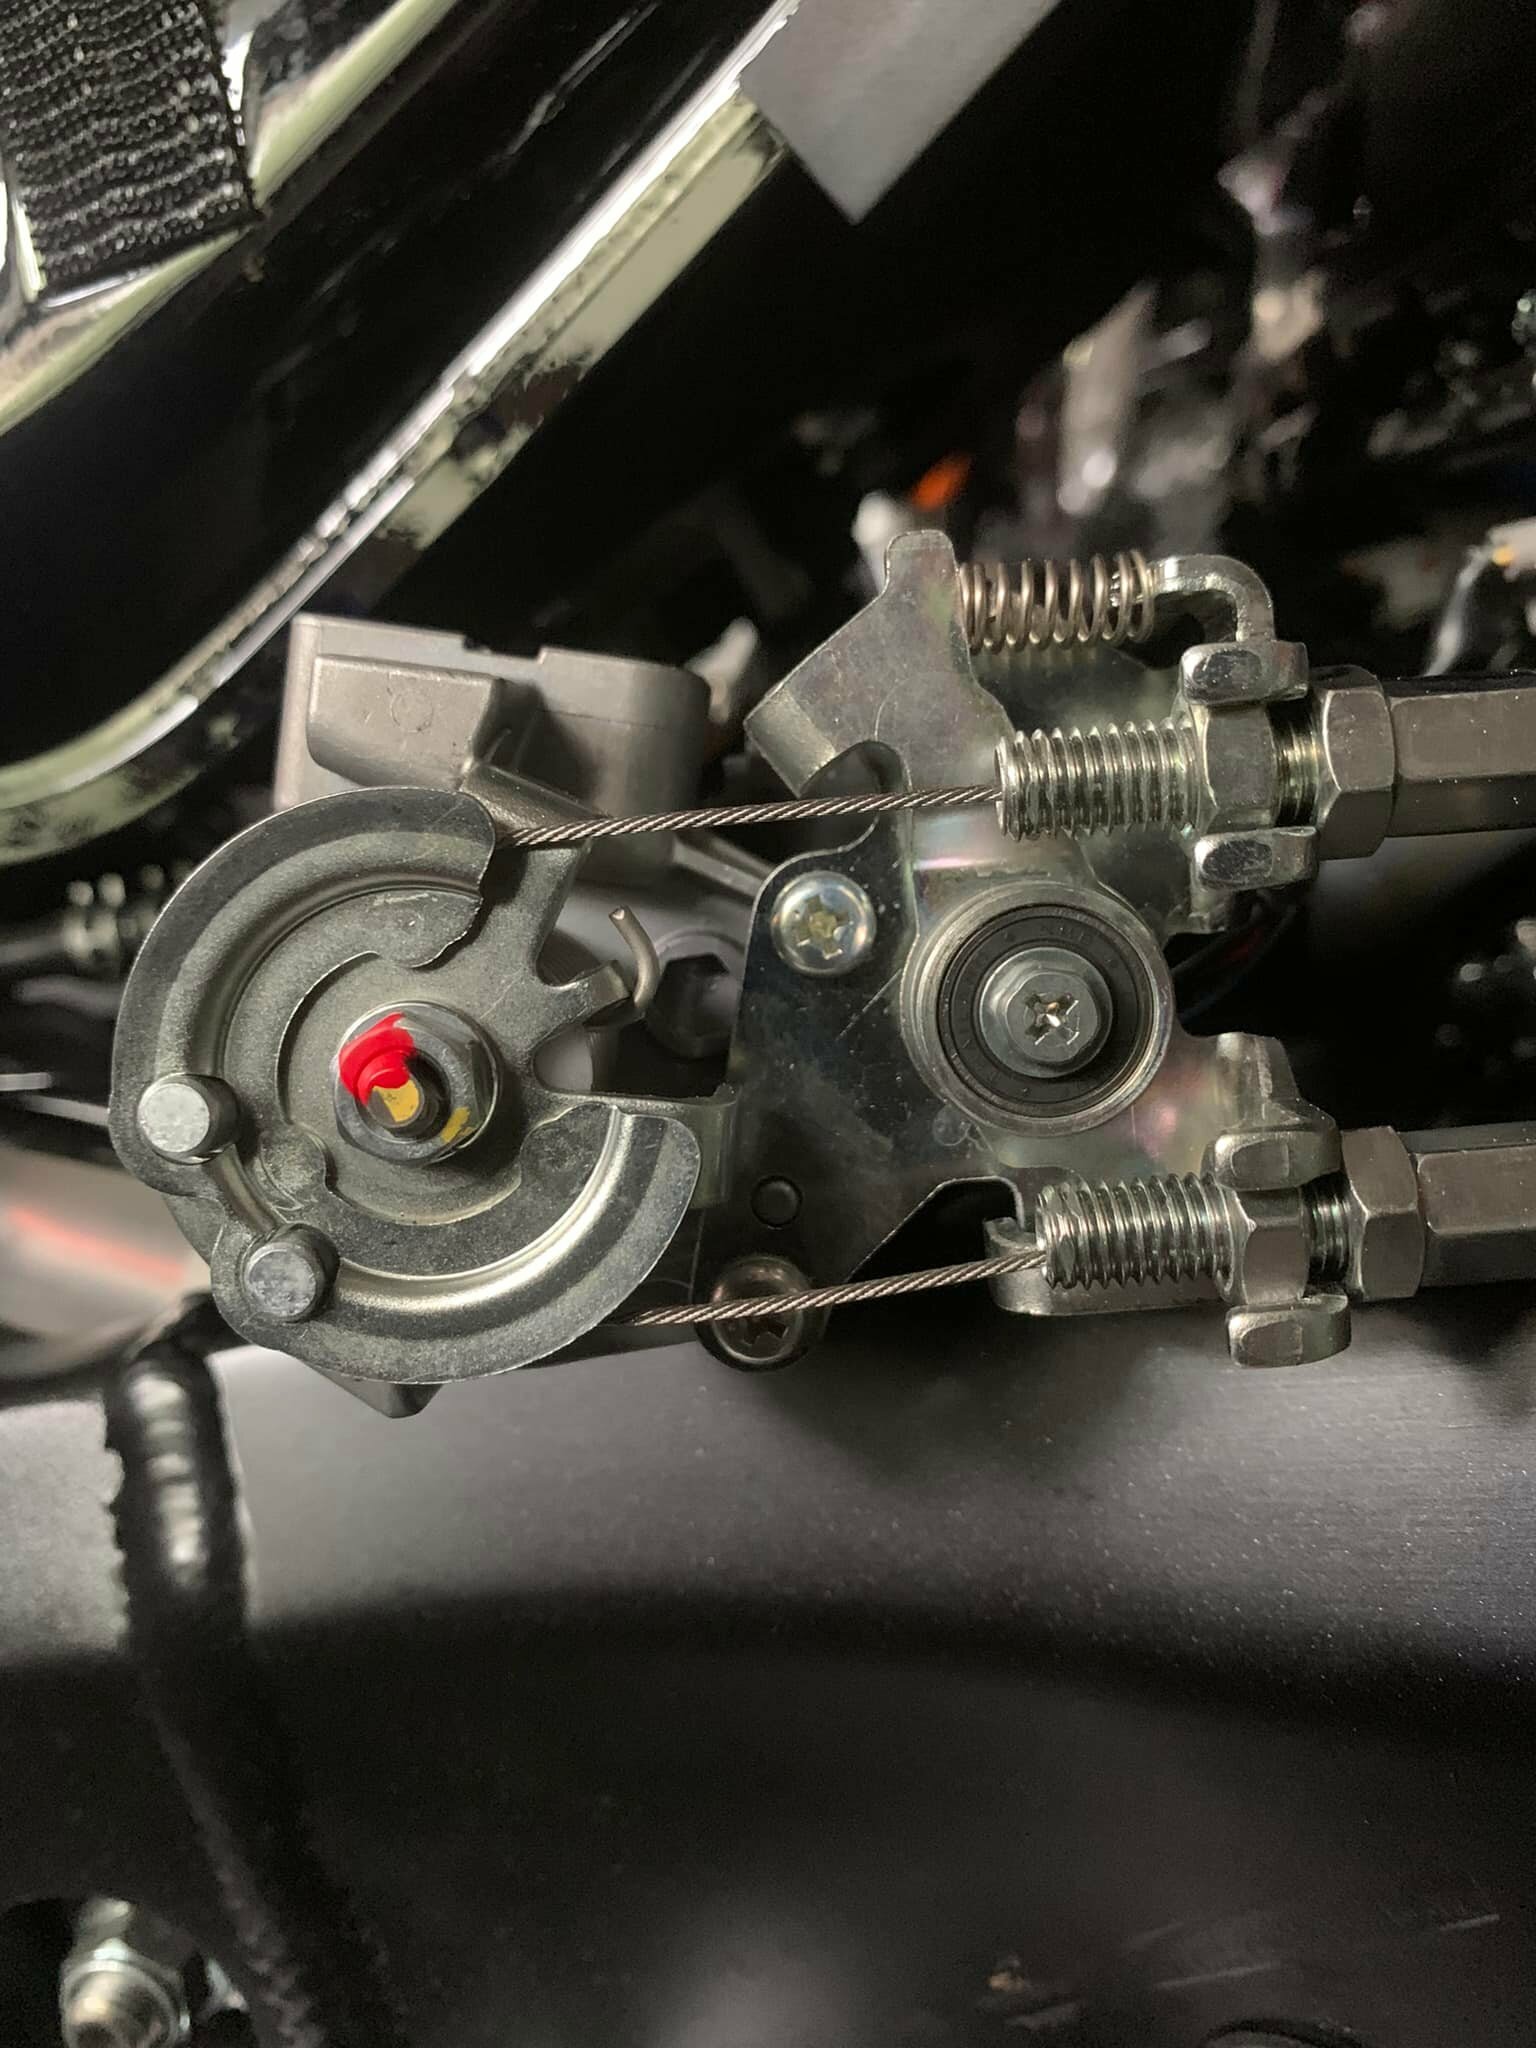
KPS Throttle Spring Busa Gen3 Made by Paul Wojick aka Kojak Description The original tension spring force of the GEN III Throttle Grip is much too forceful. With this special spring your throttle grip will be much comfortable to use As a result, the throttle grip pull is now the same to handle as the Busa Gen 1 and Gen 2. Install note Installation should only be done by a specialist / specialist workshop. Installation instructions: Remove left + right fairing parts Remove plastic tank cover and lift tank up and support it with a suitable aid (tank support). Disconnect battery. The sensor is located on the right side along the frame in front of the engine - just follow the Bowden cables. There are 2 plugs and a hose in the way to unplug the sensor, unplug them and pull the hose out of the air filter box. Now you can see the small plug from the sensor (color white) and disconnect it. Also the big long plug. Unscrew the 2 retaining screws from the sensor and remove the complete sensor. Remove the two Throttle cables. Mark the sensor position (see picture with red color). Loosen the fastening nut with spring washer of the tension spring holder and carefully remove the cover (Attention - is under tension due to the spring). If the cover is stuck, use 2 screwdrivers to slowly lever it out with feeling. Remove old spring and insert new spring in same position (position pin is in base plate). Hook the spring in the cover and insert it in the same position with pretension and skill. Insert spring washer and tighten nut and secure with screw lock. Reassemble in reverse order. Check if all connectors are plugged together, if hose is in the air filter and if Throttle cables are free. Made in Germany by certified spring factory. Idea, development and tested by Turborider Team by KPS . Hayabusa Gen 3 Throttle Spring now in shop available - 32.-€ ALL PICTURES ,Install Step by Step been in the Webshop link Link to Webshop : https://hayabusa-service.de/en/p/kps-throttle-spring-busa-gen3
-
GSX1300RRQM2 Service Manual 831 pages
Vanishing Point replied to Vanishing Point's topic in Gen 3 Hayabusa (2021 - onwards
-
Just for Busaholics on this FORUM !!! P L E A S E Don't share ON FACEBOOK KEEP IT HERE https://www.dropbox.com/s/p1pqz79dxxh27bt/Hayabusa Gen 3 Manual 99500-10L00-03E USA v1.0.0.pdf?dl=0
-
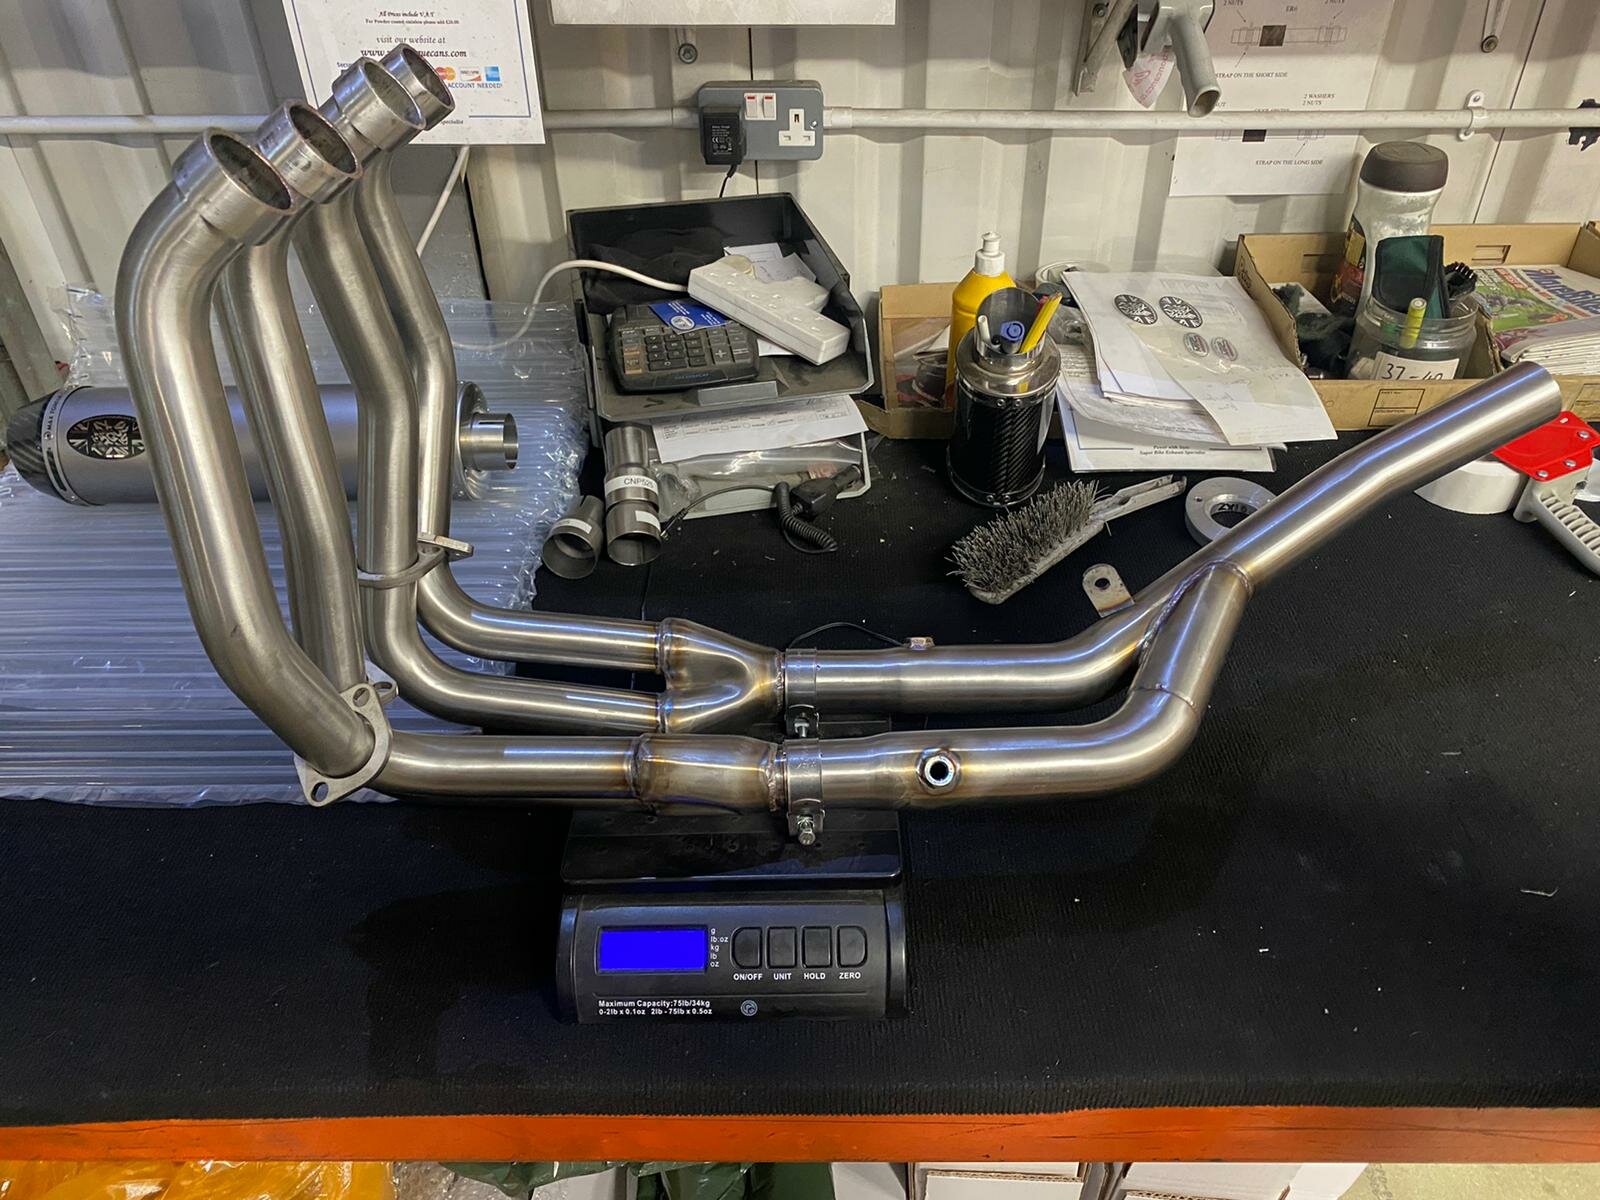
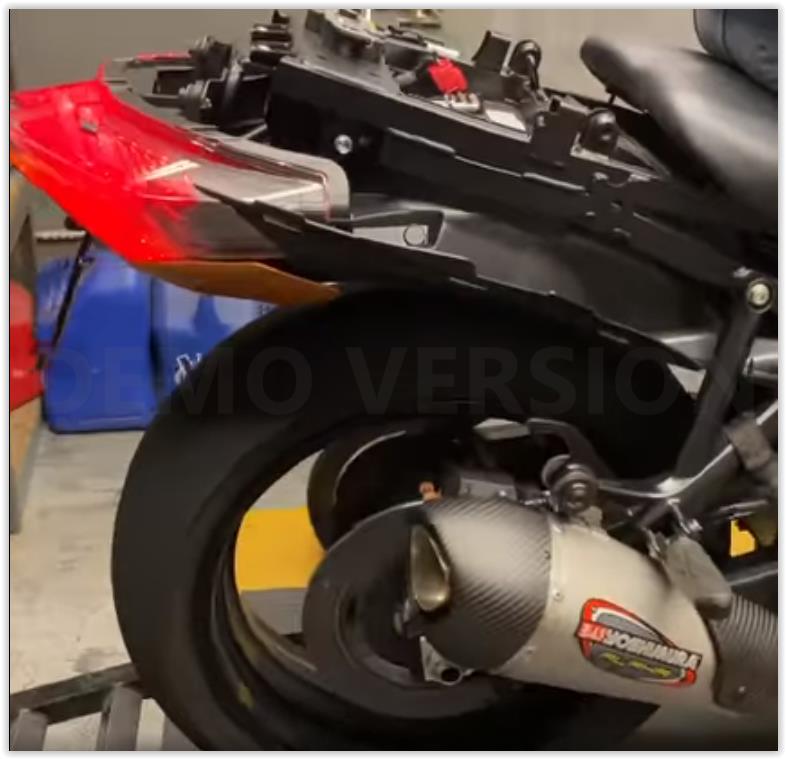
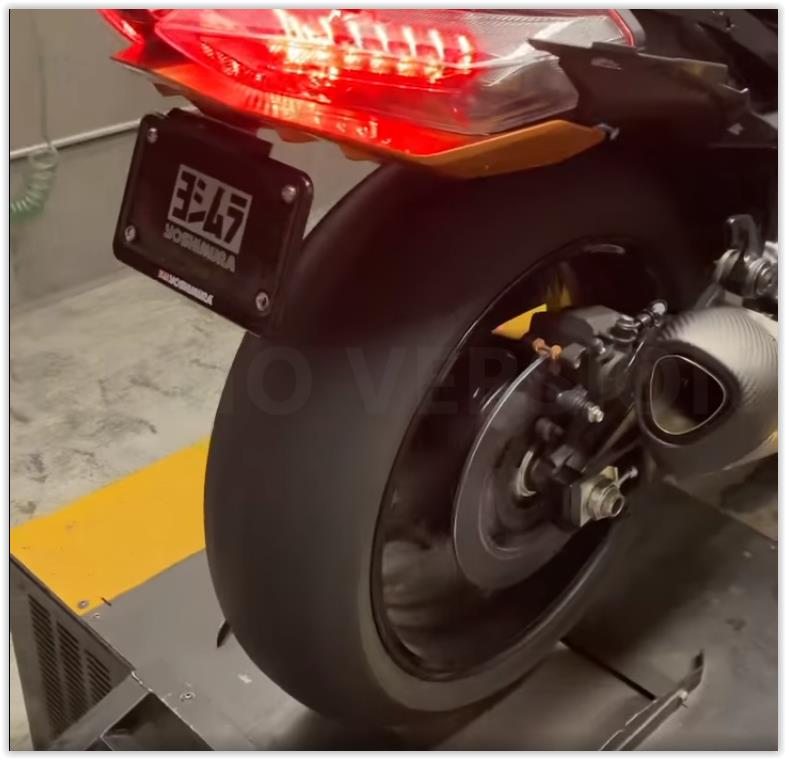
Exhaust news from UK mtc
Vanishing Point replied to Vanishing Point's topic in Gen 3 Hayabusa (2021 - onwards
-
4 in 1 system and they lost 3 lbs over yoshi 4 in 1 Pictures direct from company owner 1080p.mp4
-
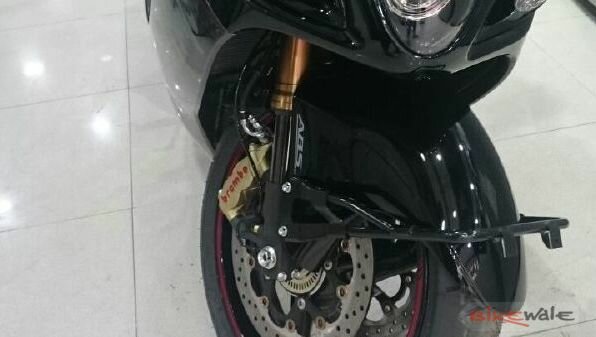
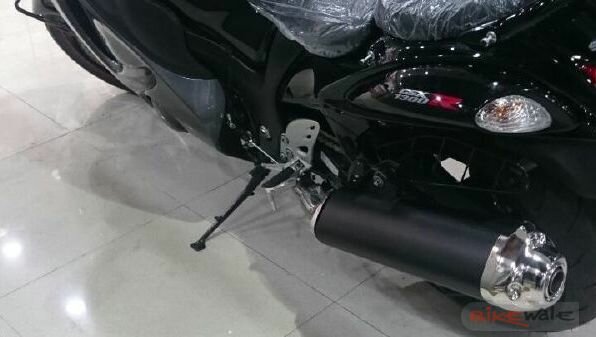
Common part in India , front licence plate holder and dress guard pictures from india plant 2017
-
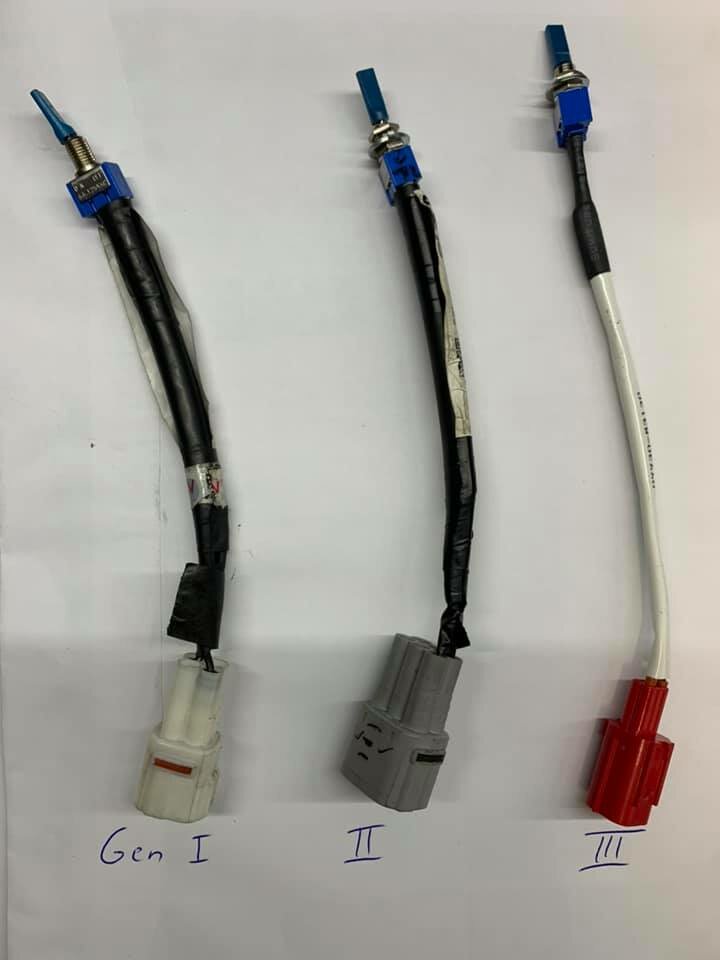
Suzuki Dealer Switch # 09930-83130 But best way is made diy with info from picture in OP Picture from Paul Wojick yesterday , the 3 diff dealer switch in one picture
-
Awaits the first proper road test
Vanishing Point replied to mark3evo's topic in Gen 3 Hayabusa (2021 - onwards
The real posting came from this : DEEPLINK WORKS GOOD -
Yessssssssssss Yoshi News , Gen3 op de Testbank https://fb.watch/4bGFP-Vxml/ Screenshots from VID Yoshi Alpha 11210AP520.pdf Yoshi Alpha db killer INS-20-K.pdf